
 Tiếng Việt


Includes a heating funnel (to place the cylinder on the kettle spout) if you want to brew light roast coffee at higher water temperatures.
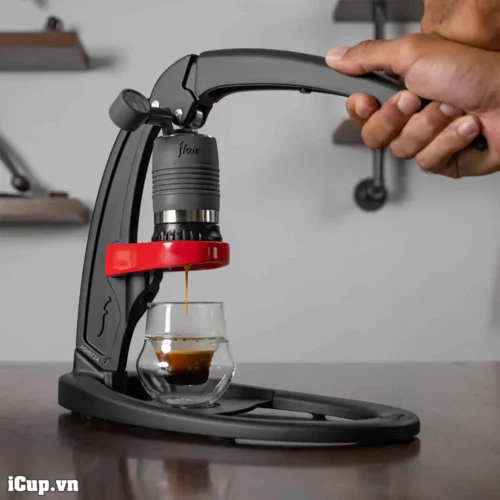
The Pro 2 is Flairespresso’s most successful portable espresso maker. The Pro 3 builds on that foundation, adding new upgrades based on user experience.
FLAIR PRO 3 INTRODUCTION VIDEO
FEATURES OF THE FLAIR PRO ESPRESSO MAKER LINE
- Compact with quick assembly or screw-in option: Can be assembled for brewing without screwing, convenient during use and storage.
- Comes with protective hard case: Easy to bring camping, traveling, etc.
- Entirely mechanical components: Just periodically lubricate the rubber O-rings and the machine can work perfectly.
- Equipped with large-capacity single-layer bottomless portafilter: Brew rich, full-bodied espresso shots while monitoring and evaluating your technique by observing the flow.
- Built-in pressure gauge: Monitor and actively control optimal coffee extraction pressure in the 6-9 bar range.
- Silicone-wrapped handle: More secure pressing feel.
3 UPGRADES OF THE FLAIR PRO 3 COMPARED TO PRO 2

MAGNETIC MIRROR
Easily monitor the flow during extraction, allowing you to evaluate and make appropriate adjustments to grind size and tamping pressure.

NEW GENERATION CYLINDER
Thinner design means less heat loss. When brewing dark roast coffee, users don’t even need to preheat like with the Pro 2 version.

INCLUDES HEATING FUNNEL
Used to rest the cylinder on the kettle spout for preheating (when higher temperatures are needed for extracting light roast coffee).
THE MOST VALUABLE UPGRADE ON THE FLAIR PRO 3

FLAIR PRO 3 CYLINDER AND PISTON ASSEMBLY

FLAIR PRO 2 CYLINDER AND PISTON ASSEMBLY
If you’ve used the Pro 2 manual espresso maker before, you’ll notice: The Pro 2’s water cylinder is quite thick and loses a fair amount of heat.
For better coffee extraction, you need to preheat the cylinder before brewing. There are 2 ways:
- Attach the cylinder cap and pour boiling water inside
- Place the cylinder upside down on the kettle spout (if the spout is small) or insert chopsticks into the cylinder to rest it on the spout (if the opening is wide)
With the Pro 3, instead of having to use makeshift tools, the manufacturer gives users 2 options:
- Thinner cylinder requires no preheating, just pour boiling water in and brew immediately: This method works for dark roast coffee that needs lower brewing temperatures around 88-90°C
- Preheat using official accessories: The funnel fits any kettle spout and will heat the cylinder while the water boils. When you pour the water in, minimal temperature is lost, maintaining 94-95°C for excellent extraction of light roast coffees.
FLAIR PRO 3 ESPRESSO MAKER USER GUIDE VIDEO
COMPLETE FLAIR PRO 3 SET INCLUDES
- Flair Pro 3 (disassembled)
- Magnetic mirror
- Included tamper
- Pressure gauge
- Funnel and coffee measuring cup (also serves to push the piston back after brewing)
- Metal base for cup/digital scale
- Metal drip tray
- Silicone-wrapped steel water chamber
- Bottomless portafilter basket
- Removable steel spout (attaches under portafilter basket)
- Silicone funnel: Used to preheat the water cylinder chamber
- Screws, hex key
- User manual
FLAIR PRO 3 ESPRESSO MAKER SPECIFICATIONS
- Brand: Flair Espresso
- Model: Flair Pro 3
- Color: Black/White
- Assembled dimensions: H254 x W320 x L160mm
- Weight: 3.18kg
- Recommended pressure: 6-9 bar
- Filter basket capacity: 16-24g ground coffee
- Water input capacity: 70ml
- Maximum coffee output: 56ml
- Materials: Aluminum alloy, steel, silicone, plastic
- Brand origin: USA
- Manufactured in: China
- Download Flair Pro 3 user manual here
RECOMMENDED FOR USE WITH COFFEE GRINDERS


EXPLORE OTHER MANUAL ESPRESSO


iCup is proud to bring customers the world’s best coffee brewing equipment


